
eStim for Android
I have updated my original eStim for Android app. Like the original version, it allows you to control a 2B from your phone or tablet.
What's new?
In terms of functionality, not much has changed in the latest app (which, just to confuse people, I have called estim 2 for Android; I'll come up with a better name). However, I have made the settings easier to manage, and a substantial re-write of some parts of the code means that communication should be more reliable. In particular, if you tell the app to do something (for example, take five minutes to reach a certain setting), and then switch away, it will carry on doing that task in the background. You might want to read about the previous version.
As ever, this is still experimental, so please do let me know of any problems you find.
What's coming?
Part of the reason for updating the app is to make it easier to extend in future. For example, some of the more sophisticated functions of my desktop app will be added in future, such as random loops, and I also have plans to make remote control much easier to set up, using a system called Estim Broker. However, I will almost certainly charge a small amount for some of those other features. There will always be a free version, with as least as much functionality as in this one.
Estim 2 for Android, version 2.20, 20th January 2016. Download from here (you need to accept apps from unknown sources; eventually this will be on the Play store, if you prefer to wait). This version includes Broker support, plus a new launch action and share function, and support for the Pebble smart watch- see below for more details.
A quick tour through the app
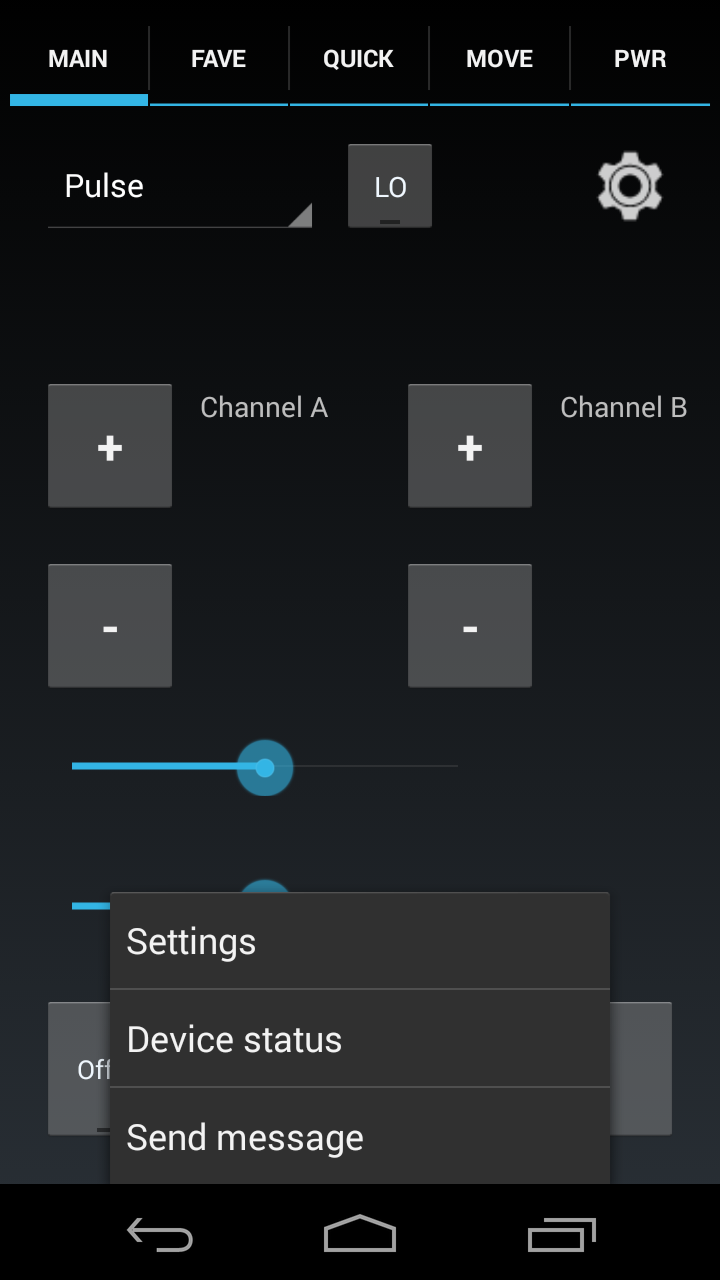
Here's the main screen; in the previous version, you swiped between screens, but frankly, I found that a bit annoying. The new one has the same screens - favourites, quick access, power display graphs, motion detection - but instead of swiping, you just tap on the item at the top of the screen. The cog opens the menu for settings and other options.
I hope the rest of this screen is largely self explanatory; tap the button marked Offline to go online. Tap the button marked Lo to set the power to Hi, and change the progrm with the drop down menu. Since sliders are fiddly, there are + and - buttons for the main settings; a single tap on each one moves by 1. A long tap moves by 5.
The two sliders adjust the C and D settings and are labelled according to the mode you select. It's much more reliable to tap them than to try dragging them.
The Stop button will reset all outputs to zero, and cancel any programs that might have been set in motion.
If you've connected to a remove system running my ECS program, then any favourites saved on that PC or Mac will be displayed below the list of device modes after connecting.
Menu options
Tap the cog to access the menu, which should pop up as shown here. The top option, settings, does what it says on the tin. Device status will report the firmware and other information about the estim unit, while the Send message option allows you to type a message that will be displayed on screen if you're connected to either the E-Stim systems Commander software, or to my own ECS software.
Settings
The settings screen has had a major revamp, alongside the guts of the program that handles the communication. If you have the digital the link cable from E-Stim Systems you can connect your device directly to the 2B.
However, please note that this is not possible on all Android devices. Firstly, your device must be running Android version 3.1 or later; I've tested it with two 'Nexus' devices, a Galaxy Nexus and a Nexus 7.
Secondly, most Android devices don't have a USB socket that you can plug the E-Stim cable into. You need an adaptor, which is a special 'On the go' adaptor, and allows the connection on your Android device, which is usually designed to connect to a computer, to act as if it's the other end of the link, and be a computer connecting to something else, in this case the 2B.
There are lots of these adaptors around; the one that I've used and that has worked for me with my software and my devices, is this one, available on Amazon for under a fiver (I've also used one from Maplin too, but they're a bit more expensive):
Afunta(tm) USB 2.0 A Female to Micro B Male Adapter Cable (Micro USB Host Mode OTG Cable)
Note that even with the adaptor, not all Android devices support the 'USB Host' mode necessary; for example, even though it has Android 4.1, the HTC One S that I have also used for testing will not support a direct USB connection - it can only use the USB port to charge. So, before you rush out and buy cables, try googling your phone model and 'USB Host'
Install the app, make sure you have nothing else installed that wants to use the USB port for serial communications (which is unlikely), and then connect the adaptor to your device, and plug the E-Stim cable into it. You should see a screen asking you if you want to have the eStim app launch each time the cable is connected.
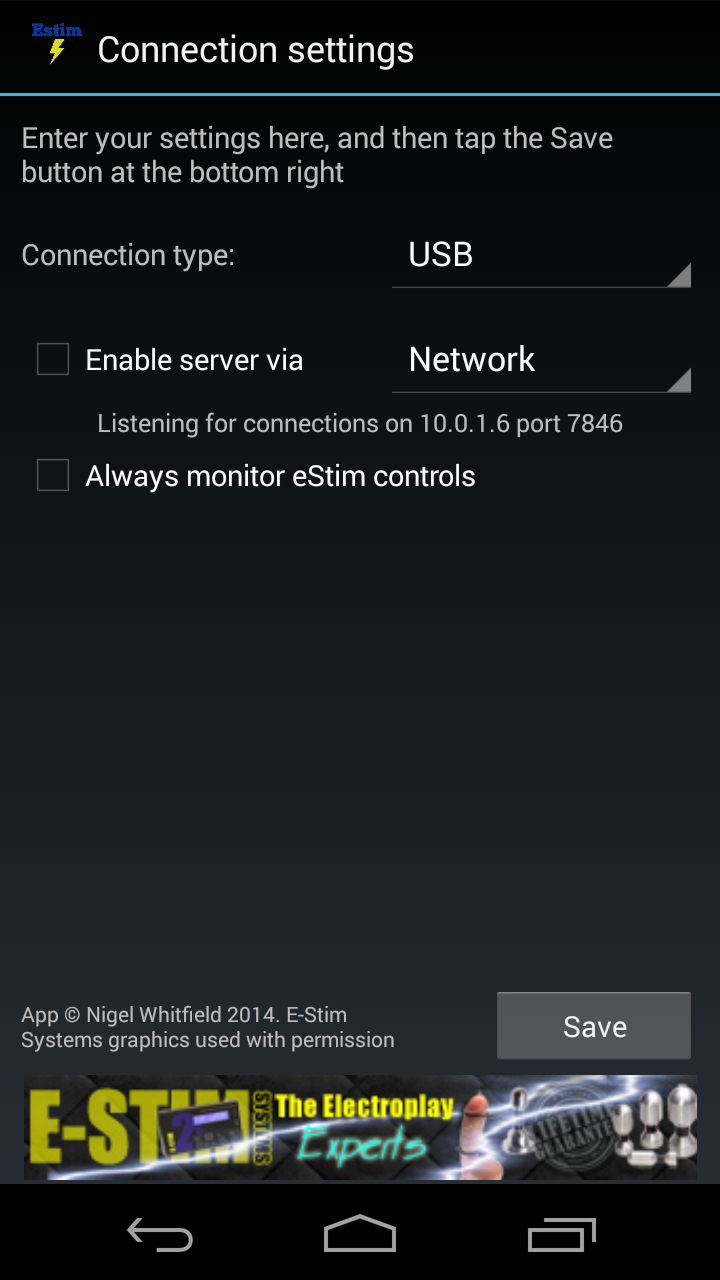
As you can see, when connecting via USB, there are two other options available; you can enable a server via either TCP or Bluetooth, and 'Always monitor eStim controls.'
The second option means that the app will periodically send a command to the 2B to get its status. By doing that, it ensures that the display on screen always follows what the box is doing. Won't it do that normally? Well, yes, as long as you just control it via the app. But by turning this option on, the display on the app will update even if the dials are adjusted on the box.
This helps avoid unexpected jumps - for instance, if you had cranked the output up to 40 using the app, then and then pressed Select on the box to quickly stop output when someone came to the door, without monitoring, the app won't know that's what you've done. So later, if you press +, while you might think you'll be starting at 0, the app thinkgs it's already at 40, and sends the command to set the output to 41. Ouch! So, if you think you might use the controls on the 2B as well, turn this option on. It's always turned on when the box is acting in server mode, regardless of the setting you choose here, to ensure the other end knows the current settings.
Turning on the server allows the app to receive connections, either via Bluetooth (from another phone, in a club, for example), or via a wifi connection.
Network connections
This is the settings screen you'll see when you choose a connection via the network:
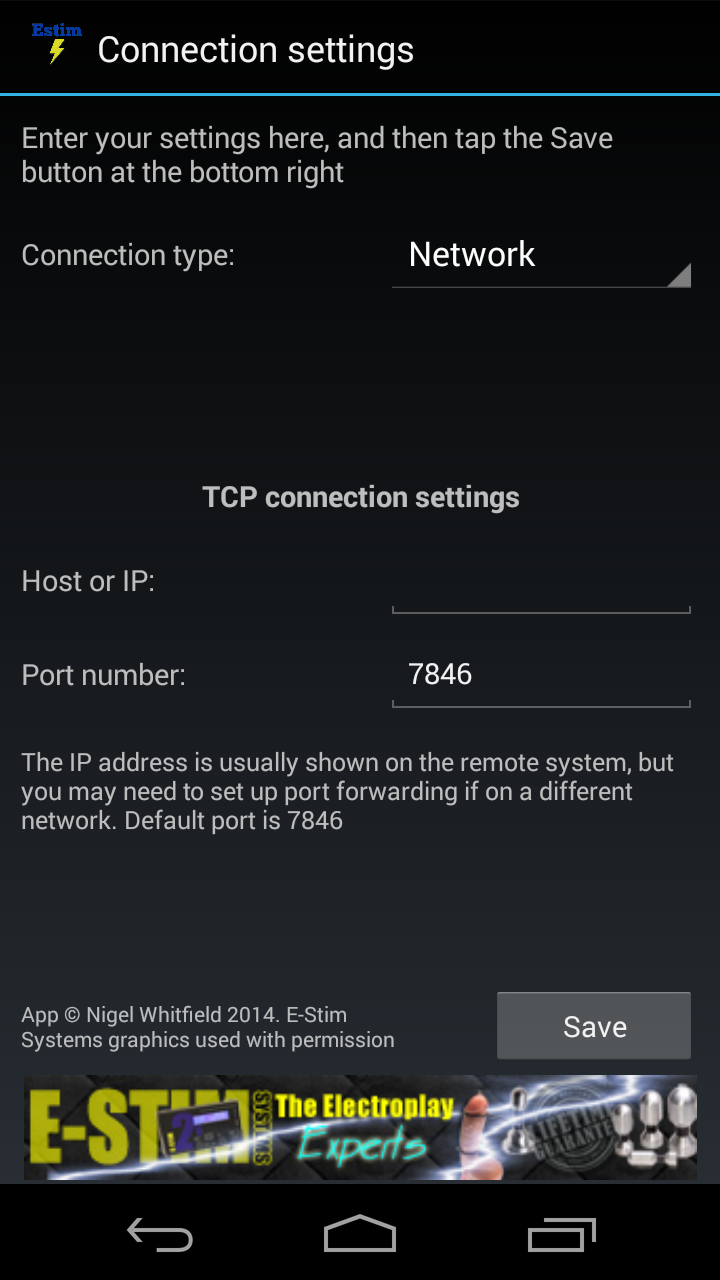
Fill in the host name or IP address of the remote device you want to connect to, which is itself connected to a 2B. As I mentioned, that can be either the Commander2 software, or my own Estim Control/Remote software; both are available for Mac and Windows, and now another Android phone with its server enabled. If you are connecting over the public internet, remember that you're going to have to work out IP addresses and port forwarding settings yourself. It's probably best to test this stuff with the server software and the android phone both connected to the same network, so you can see how it works, before going any further.
Bluetooth settings
It's also possible to connect via Bluetooth:
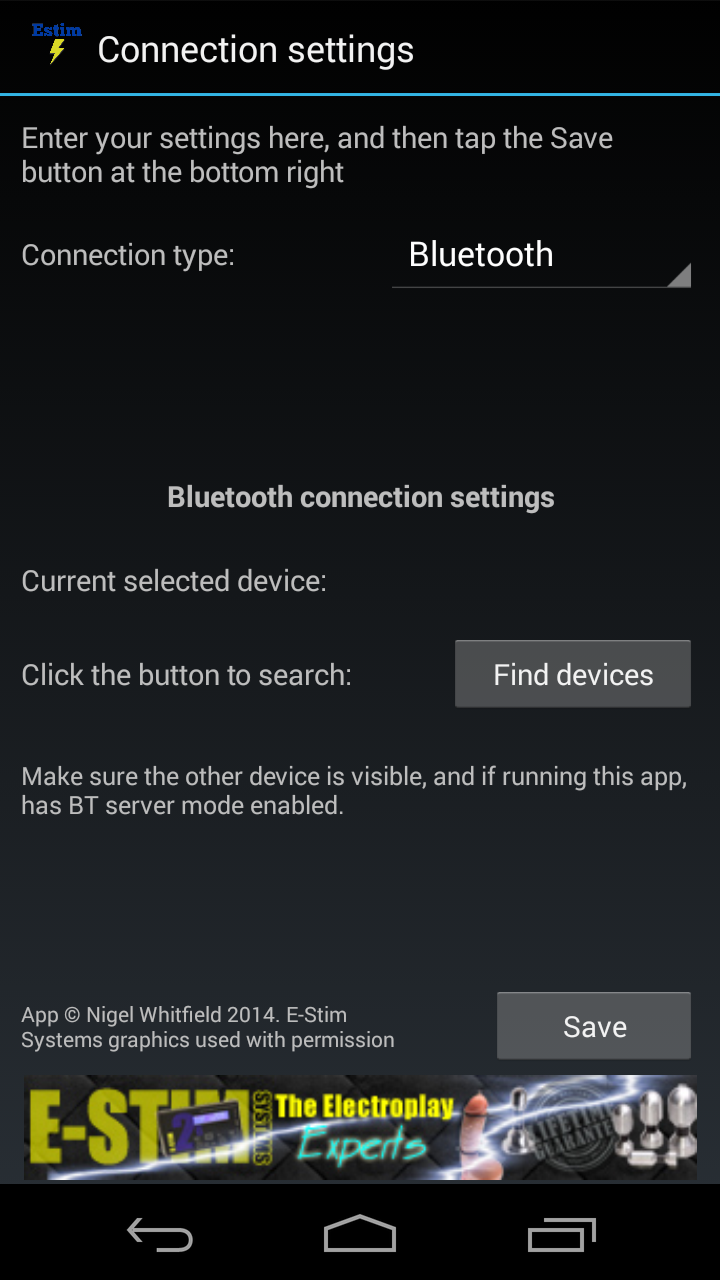
If there's no selected device show, just tap on Find devices, and make sure the other device is set to be discoverable. The other device can be another phone, running the same software, or it could be a custom made bluetooth adaptor plugged directly into a 2B.
Other tweaks in this version
By and large, this app has the same functionality as the previous one. Aside from cosmetics and the work under the hood, the main change is the addition of mode options on the Favourites screen:
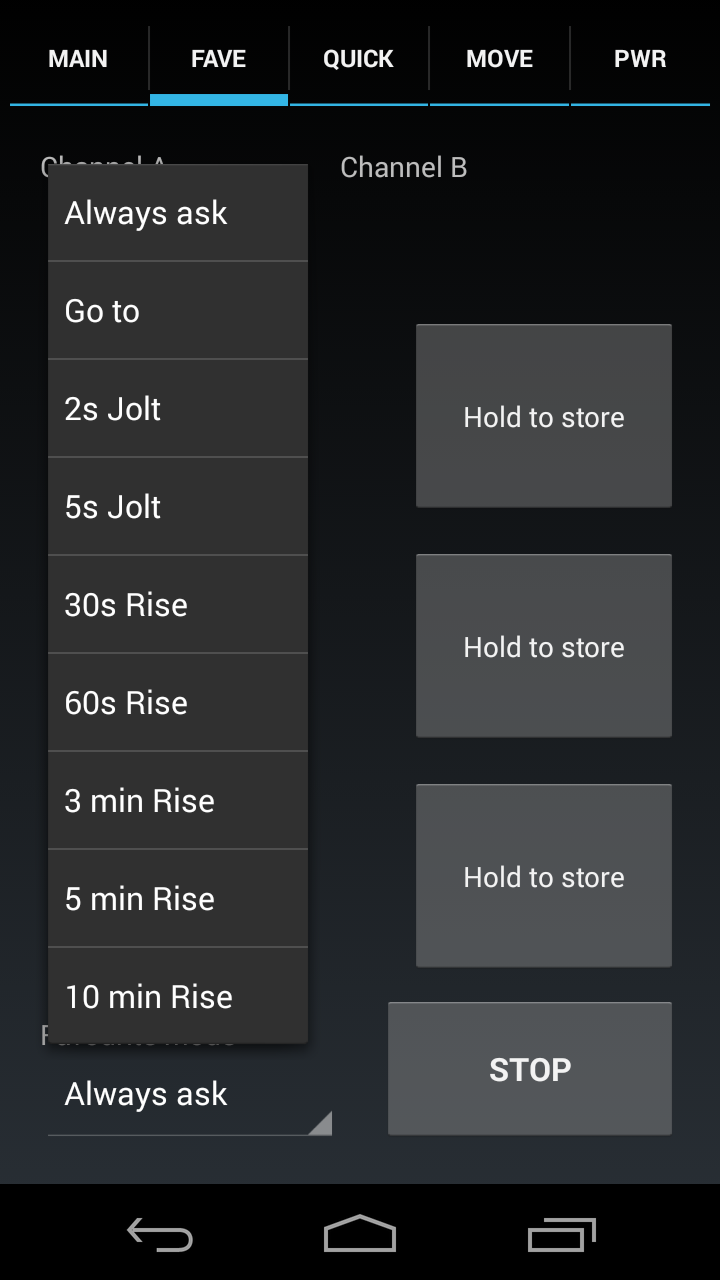
On this screen, you can save the current settings into one of the six favourites slots by a long tap on one of the buttons. The pop up menu determines what happens when you tap on a favourite to launch it; if 'Always ask' is selected, you'll be asked each time to make a choice, or you can select one of these as a default. The more reliable background code means that it's now possible to include 3, 5 and 10 minute options, in addition to the previous 30 and 60 seconds. Pick one of these and the app will take that long to reach the settings specified by a particular favourite. From version 2.20 the 2 second jolt has been changed to a 3.5 second jolt, as some modes on the 2B take a while to reach the desired levels.
Functions on the other screens of the app have not been changed in this version.
On the Quick page, you can go to the previous or next favourite with a single button, and use the Boost function to increase power over a specified period. Long tap on the Boost button to set the options for how much each channel will increase, and how long it will take.
On the Move page, set up the motion detector by tapping the Calibrate button and waiting until it's done, then select what happens when motion is detected, and tap the Motion button to enable detection.
The Pwr page shows graphs.
Countdown timer
The countdown, or session timer, allows you to set a maximum time for the stim session. Tap the cog to pop up the menu and you'll see a new option, 'Start countdown'
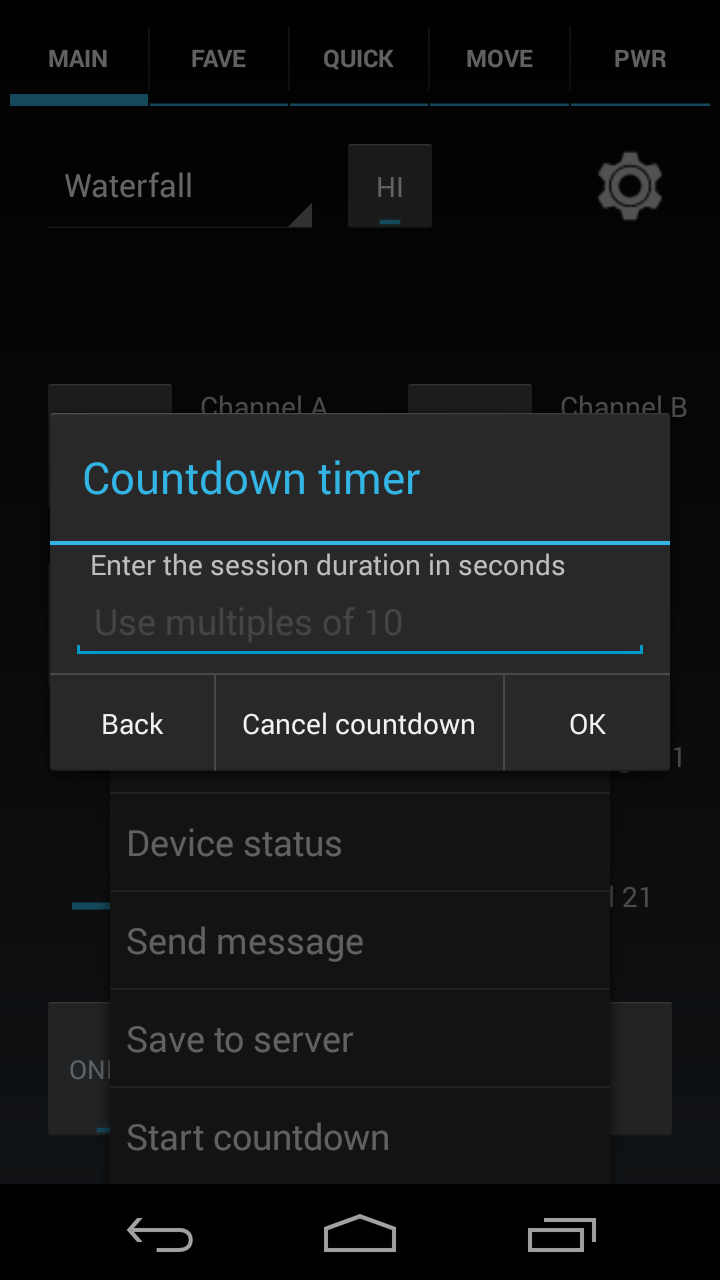
Enter a time in seconds and tap OK to start the timer. When there is a whole number of minutes remaining, you'll see an on screen message like "Session ends in 10 minutes" flashing up briefly once a minute. From one minute, the message will show the number of seconds, every ten seconds, until the timer reaches 0, when the message "Ending session" will appear, and the output levels will gradually be reduced to zero, over a period of around 30 seconds (possibly longer, if you have turned them up very high).
You can abort the countdown if you wish by selecting the same menu option, and choosing the 'Cancel countdown' option shown in the screen above.
The timer does not affect the output of the box, except when it's ending the session - so you can change settings, use the Boost function, or whatever else you want - including just leaving it on the same thing.
Launch and share functions
The latest version of the Android app intercepts links of the form http://broker.roughsex.org/brokerid. When a link like that is opened, your device will ask you whether you want to open it in a web browser, or in the estim app. If you choose the app, then it will automatically set the connection type to Broker and attempt an auto-connection to the user with the id specified, who can then accept or reject the connection (or have it automatically accepted). So, for example, clicking the link http://broker.roughsex.org/nigel@roughsex.org on an Android device with the latest app version installed would start the app, and attempt to connect to my 2B.
If the user who has clicked the link has not set up a broker ID, then they'll be asked to enter one before continuing.
The share function makes this even easier - tap the cog and go to the settings screen; make sure your Broker ID is entered correctly (see the Broker page for more info, and some screen shots). Tap the user icon to see the list of users to automatically connect or reject. If you want to make life simple for someone you're playing with, add them here, set to 'Accept'
Next to the Add user icon, the new version includes a Share icon. Click this and the app will create an email for you - you may be asked which app to use, in which case select your favourite email add. This shows the message created in Maildroid:
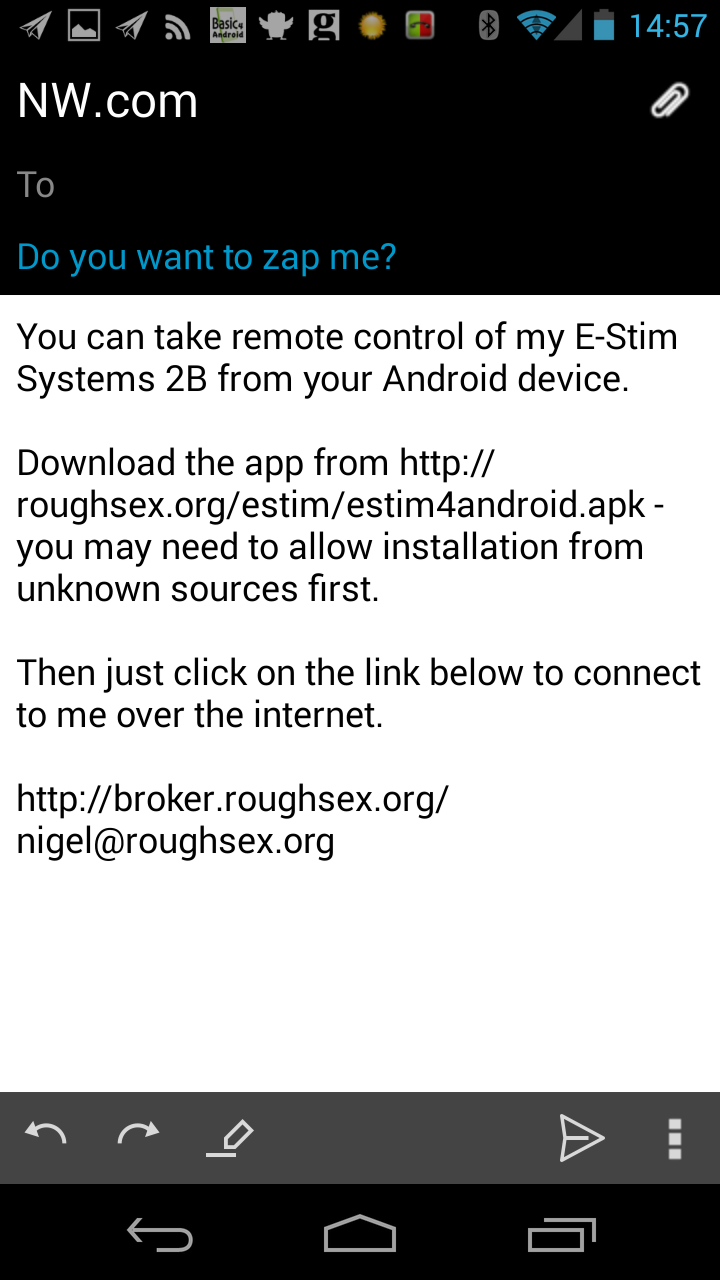
You can change the message if you like, or just enter an email address and tap Send. The recipient gets the link to download the app, and the link to connect directly to you via the Broker, making it just about as easy for them to get up and running as possible. All they'll have to do after installation is enter their email address.
New in version 2.22 - Pebble support, and minor tweaks
Version 2.22 adds a minor tweak, mentioned above - the two second jolt option for motion detection and launching a favourite has now been changed to a 3.5 second jolt, to ensure you feel something. Some modes on the 2B take their time to reach the output requested, and so this ensures you do get a zap before the outputs turn off again.
A small change to the language on the settings page now says 'Enable control via' instead of 'Enable server via', and an additional option is now available, 'Pebble'
The Pebble Smartwatch is a smart watch with an e-paper display and three buttons (up, select, down) available to user apps. It links to a phone via Bluetooth, and the phone runs a Pebble App, which communicates with other apps on the device. The original Pebble is currently available for a very good price, at at the time of writing (Jan 2016) the Pebble Steel was available from Currys for £80. You will need your Pebble to be updated to the latest (v3) firmware, and the eStim system should work with the Pebble Time as well, which has a colour display, though the app is designed in black and white. It has not been compiled to work on the Pebble Time Round, however.
How to use Pebble with eStim 4 Android
Install the latest version of the eStim 4 Android on your phone, and make sure you have set up your Pebble watch, with the Pebble Time app. Open the settings in the eStim app, and tick the box maked 'Enable control via' and select Pebble from the list of options. You'll see a screen like this one on your phone:
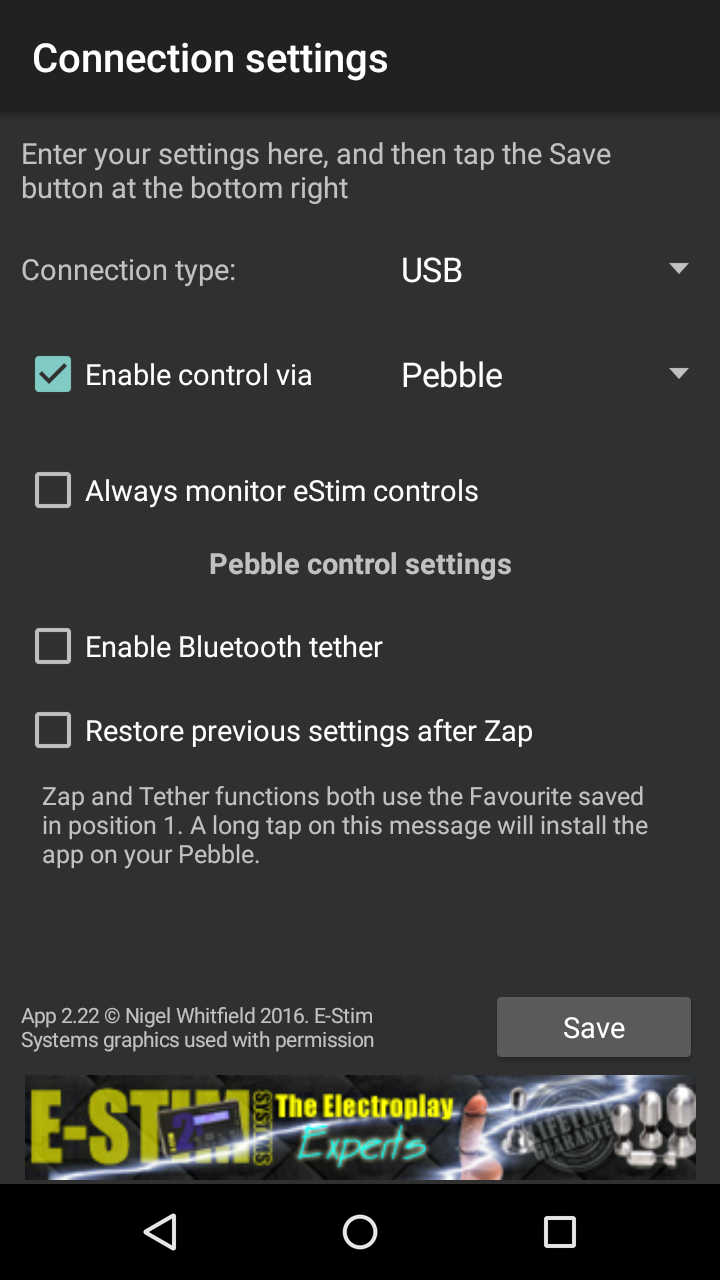
Note that the Always monitor eStim controls setting is ignored when using a Pebble. There are only two settings you can change in the app. Enable Bluetooth tether is intended for a situation where one person has the eStim device and phone on them, and it is being controlled by someone else using the Pebble watch. When this setting is turned on, if the phone goes out of range of the watch, causing the Bluetooth connection to be lost, a five second burst of the settings stored in the first favourite will be applied. After that, the box will switch off the outputs.
The second option is used with the Zap function on the watch. If this is turned on then, after a Zap, the previous settings will be gradually restored, at a rate of roughly one step per second (ie, if the highest level was 30, it will take 30 seconds). If this option is not selected, then after a Zap ends, the outputs of the 2B will be switched off.
The file that needs to be installed on your Pebble is included within the Android app. You can install it on your watch via a long press on the note below the options. You'll probably be asked which app you want to open it with, and you should choose the one that your Pebble is currently connected to (usually 'Pebble Time').
Using the Pebble watch app
The app is installed on your phone and called Estim for Pebble. If can be started from the menu like any other app, but once you have enabled control via Pebble in the Android app, the watch app should also automatically start. When it does, press the Select (middle) button on the watch to get the current status of the 2B.

In normal use, when you press a button on the phone, you will see a brief note about the command being sent, then the display should update with the status from the 2B. If the command stays on screen, there may be a communication problem, and sometimes exiting and restarting the watch app will fix it.
The top button changes the value of the current setting on the 2B up, one step at a time, and the bottom button changes it down. Both buttons will step up or down by 5 in response to a quick double press.
On the watch display, the small black square indicates which setting is currently being changed. Press the middle (Select) button to move to the next setting, eg from A to B to C and so on. If the D setting is not applicable to the current program, pressing Select will take you from C to A.
As a shortcut, a double press of the Select button will switch between A and B. If you are on any other setting it will take you back to A.
A long (more than one second) press on the Up button is a quick STOP command, and will turn off both outputs on the 2B immediately.
A long (more than one second) press on the Down button is a Zap command. When you hold the button down, the 2B will be set to the settings stored in Favourite position 1 of the Android app, and the output will remain at that setting until you let go. When you let go, the output will either be turned off, or restored gradually to the setting in use before the Zap, depending on the preference set in the Android app.
To change the mode of the 2B to a different program, use a long press (more than half a second) on the Select button. The display will update and show the name of the current program with » before it, like this:

Now, the Up and Down buttons will move through the list of programs available on the 2B. When the program you want is shown on the display, a long press on the Select button will set the box to that mode, resetting the outputs to zero.
If you decide you do not want to change the settings, a short press of the Select button will cancel the process.
While in program select mode, you can still use a long press of the Up button to send a STOP command, and a double press of Up or Down will change the setting of the current channel by 5 steps.
Notes and known issues
Pebble support is experimental. Use at your own risk. Since radio communications are involved, remember that it may not always be possible for commands, in particular the STOP command, to be sent from the watch to the phone and then to the 2B.
In some circumstances, it appears that each button pressed on the Pebble is registered twice by the Android app. If this happens, close the Android app, and restart it.
Download
You can download the apk file by clicking or tapping here. Remember to allow your device to install software from any location.
Want to play?
If you're interested in trying out the software, or just have any questions, you'll find me as LondonSubNigel on the Estim and SmartStim forums, as well as on Recon and GearFetish, or just email nigel at roughsex.org